How to Get Your ChatGPT API Key?
To enable AI features like Smart AI Rewrite and OCR Image AI, you need a valid ChatGPT (OpenAI) API key. Follow these steps to get one:
⚠️ You Must Set Up Billing First
Before you can actually use the key, OpenAI requires billing to be added—even if you’re just exploring or using free trial credits. Many users miss this step and wonder why their API key doesn’t work.
But don’t worry—you can start with as little as $5 to test everything out safely.
How to Get ChatGPT API Key (Step-by-Step)
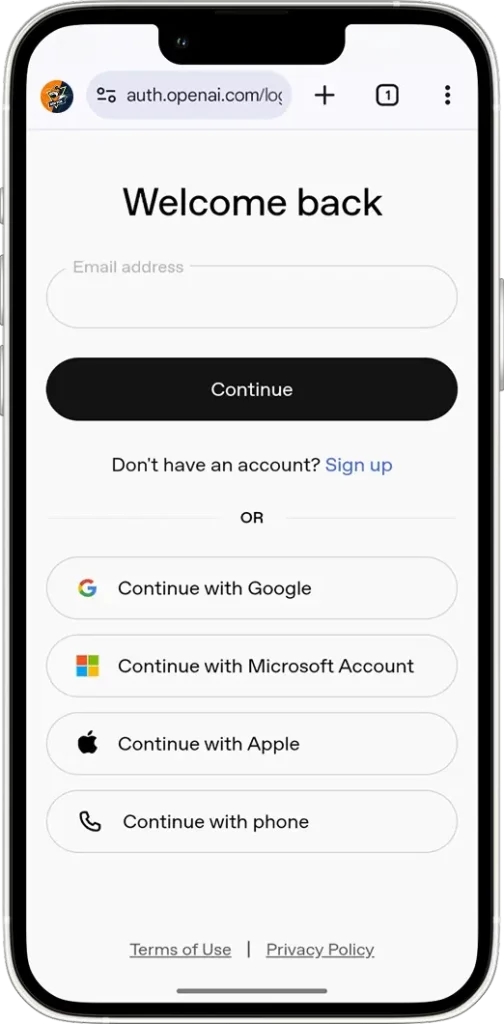
🧩 Step 1: Create or Sign In to Your OpenAI Account
Click Sign Up to create a new account, or Log In if you already have one.
You can sign in with your Email, Phone, Google, Apple or Microsoft account.
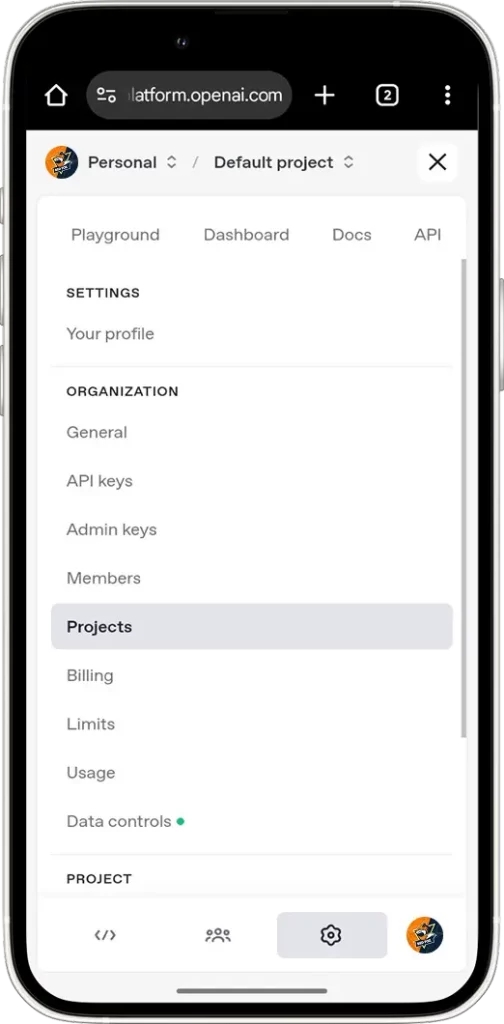
📁 Step 2: Create a New Project (Organization)
Before you can create an API key, you need to be inside a valid Project (or Organization).
After signing in, go to the Click Here
If you see an existing project, you can use it. Otherwise, click
+CreateGive it a name (e.g., “project-1“)
Click the
Createbutton to save
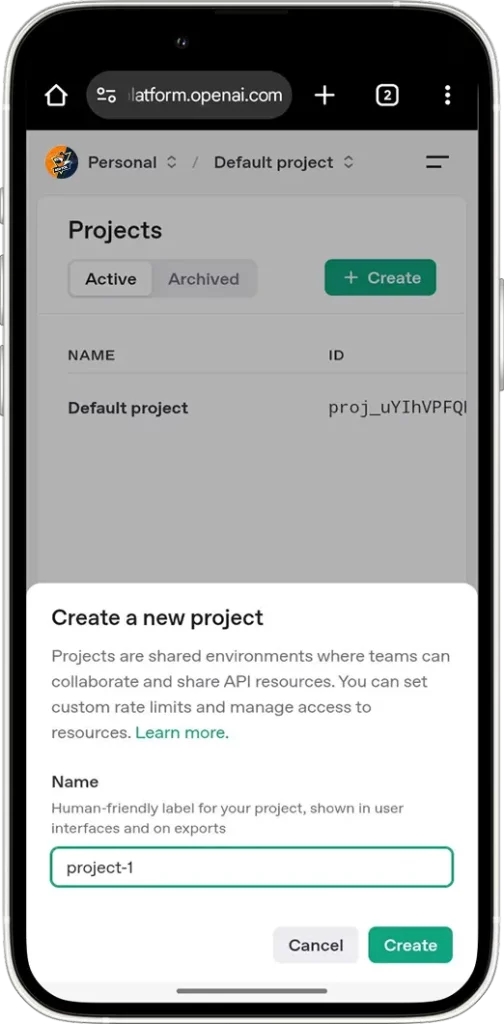
💡 Each project will have its own API keys and usage settings.
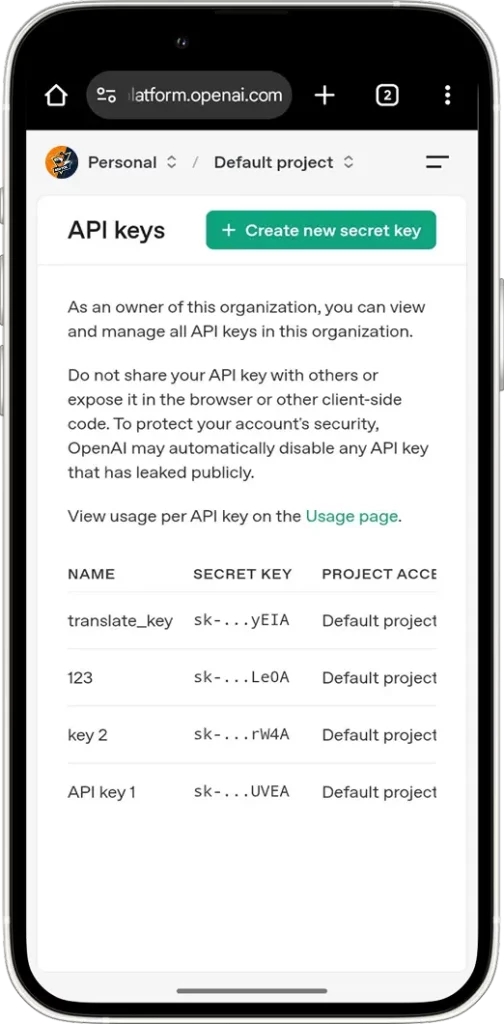
🔑 Step 3: Access the API Key Dashboard
After creating a project, navigate to: Click Here
This is where all your API keys live. If you don’t have one yet, don’t worry—we’re about to create it.
➕ Step 4: Create a New API Key
Click the
+ Create new secret keybutton in the top-right corner.In the pop-up:
Name (Optional): Give your key a custom name (e.g., “aimode-key“)
Project: Select the project you just created in the previous step from the dropdown menu
Permissions: Select All to grant full access
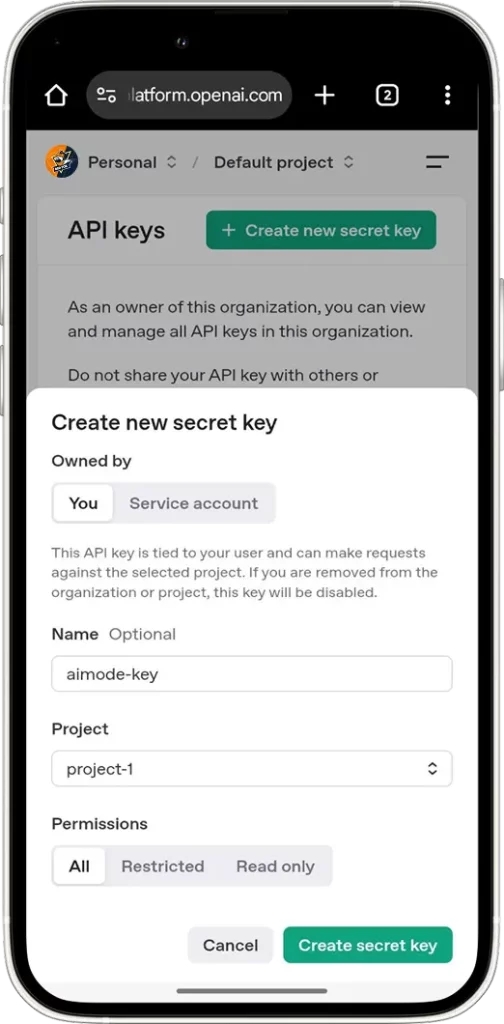
Click
Create secret keyYour new API key will appear in a pop-up window
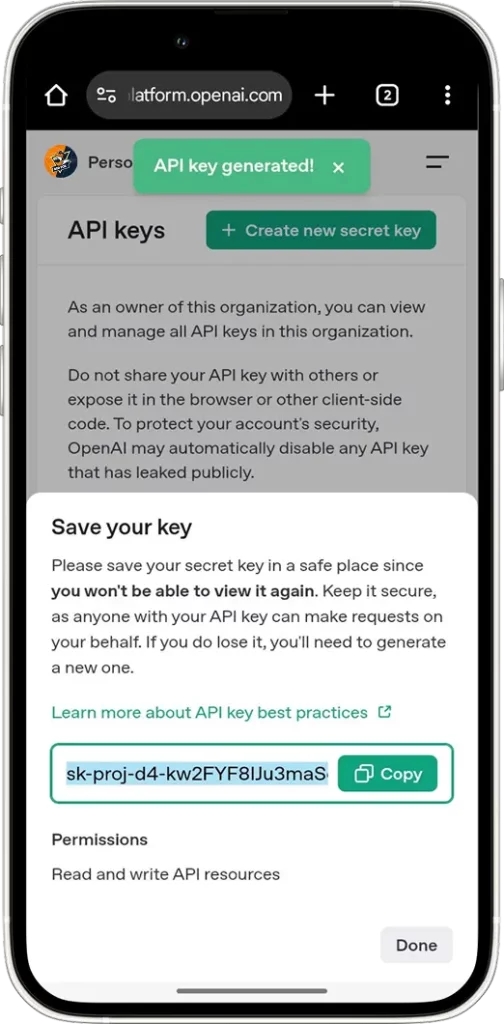
⚠️ Copy it immediately. You won’t be able to view it again later.
Recommended storage options:
Password manager (e.g., 1Password, Kaspersky Password Manager, etc.)
Internal secured note system
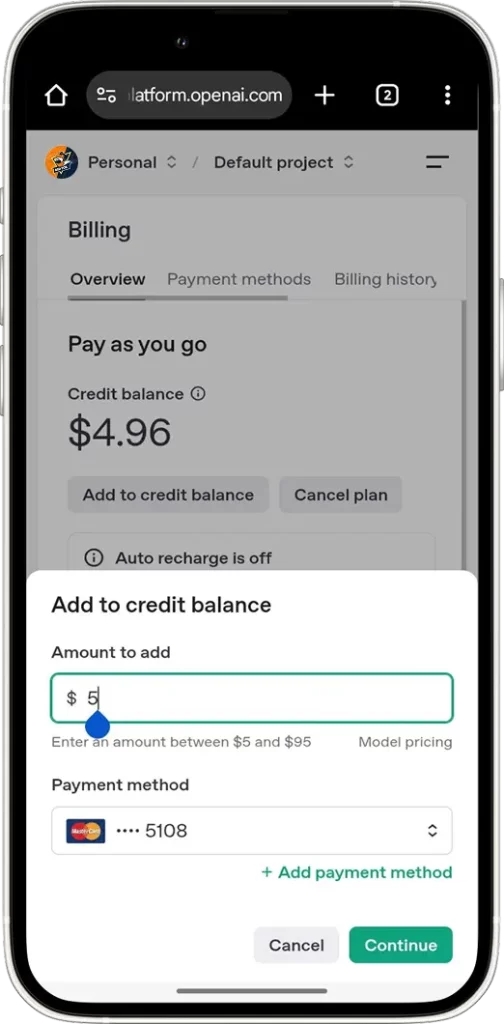
💳 Step 5: Add Billing Information (Required for API Key Use) – How to Get ChatGPT API Key
Even though you now have an API key, it won’t work until billing is added and activated.
Follow these steps:
Visit the billing page: Click Here
Click “
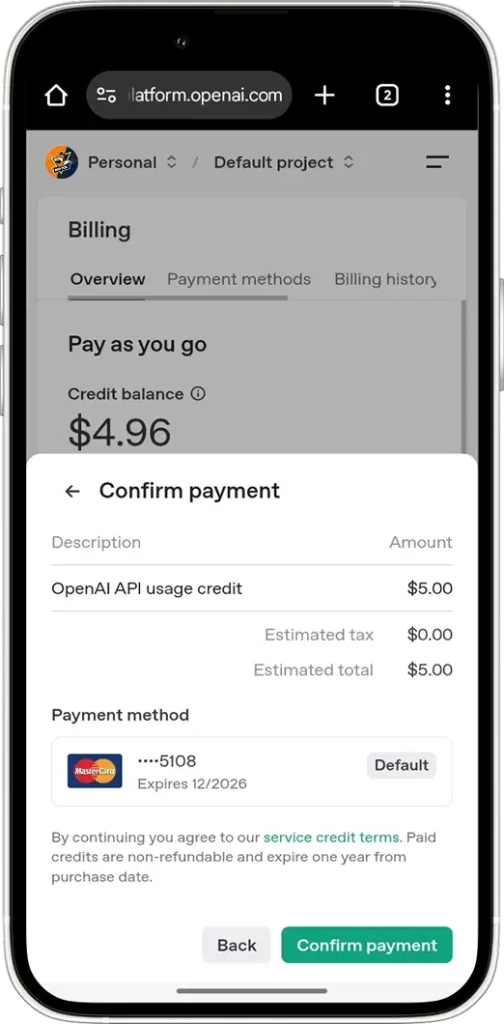
Add to credit balance”Enter your credit or debit card details
Click “
continue” and “Confirm payment“
💵 Tip: During this process, you can preload a small amount—$5 is more than enough to test the API comfortably.
🚀 Step 6: Start Using Your API Key
Now that your billing is active, you can use your GPT API key
🧠 Common Questions – How to Get ChatGPT API Key
1. Can I use the GPT API Key for free?
GPT API Key is not free — there are no trial credits. Although you can create an API key, it won’t work until you add billing information
2. What happens if I lose my key?
You can’t retrieve a lost GPT API key. Revoke it and create a new one via your dashboard.
3. Is $5 enough to test it?
Yes! $5 lets you try out multiple small requests—plenty for experimentation or prototyping.
4. Does using GPT API Key for OCR on images cost more than processing plain text?
Yes. OCR on images consumes significantly more tokens because the model needs to analyze and extract text from the visual data, which is more complex than processing plain text input. As a result, OCR requests generally incur higher costs.
5. Does the length of extracted text affect billing?
Yes. Billing is generally based on tokens processed, so longer extracted text means more tokens and higher costs.
❣️ Final Thoughts
Just $5 is enough to start using OpenAI comfortably—just make sure you set up billing first, then enjoy powerful features when combined with Auto Forward For Telegram bot.
Last updated
Was this helpful?