> For the complete documentation index, see [llms.txt](https://docs-v2.autoforwardtelegram.com/llms.txt). Markdown versions of documentation pages are available by appending `.md` to page URLs; this page is available as [Markdown](https://docs-v2.autoforwardtelegram.com/fundamentals/debug-mode-for-task.md).
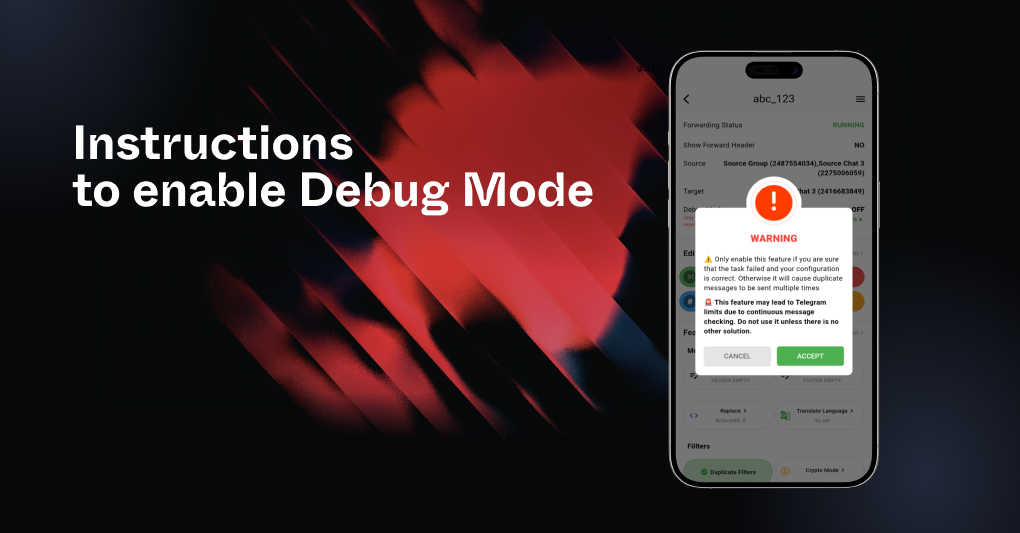
# Debug Mode For Task
{% hint style="success" %}
### **Download Mobile App or use Web**
✅ **iOS** → [App Store](https://apps.apple.com/us/app/autoforward-for-telegram/id6447486093)\
✅ **Android** → [Google Play](https://play.google.com/store/apps/details?id=com.autoforward.telegramforward)\
✅ **Web** → [web.autoforwardtelegram.com](https://web.autoforwardtelegram.com/)
{% endhint %}
This guide explains how to enable and disable the **Debug Mode for Tasks** feature in the application. Debug Mode is designed to troubleshoot issues where new messages are not received from the source chat. It should only be used as a last resort and with caution.
***
**Function Overview: Debug Mode for Tasks**
Debug Mode helps diagnose and resolve issues in message forwarding tasks. However, enabling this feature may result in Telegram-imposed limitations due to continuous message checking. Use it only if:
* You are certain the task is failing despite correct configurations.
* No other solution resolves the issue.
**Important Notes:**
* Disable Debug Mode as soon as the issue is resolved.
* Enabling Debug Mode may prevent events such as edited or deleted posts from being received.
**How to Enable Debug Mode**
**Step 1: Open the Application**
1. Launch the **AutoForward for Telegram** application.
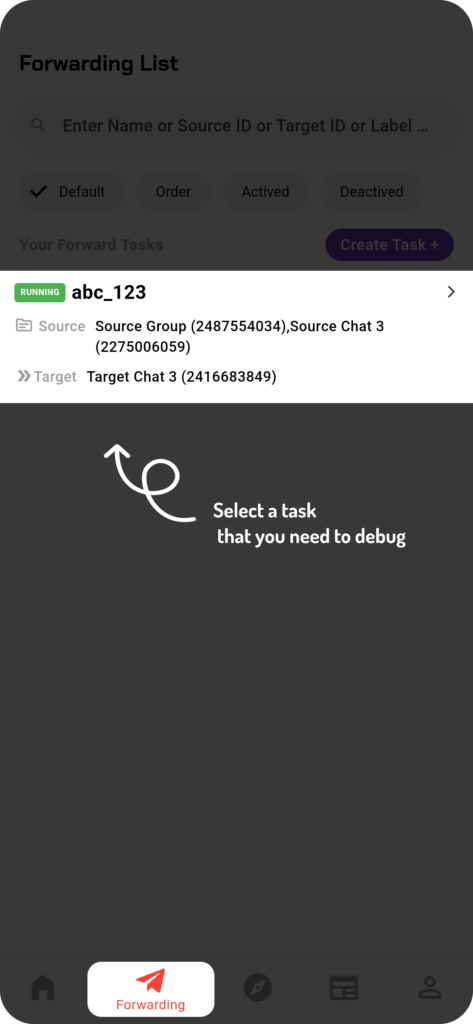
**Step 2: Select the Task**
1. From the **Task Forward List**, locate the task where you want to enable Debug Mode.
2. Tap on the selected task to open its **Detail Task** screen.
Select a task that you need to debug
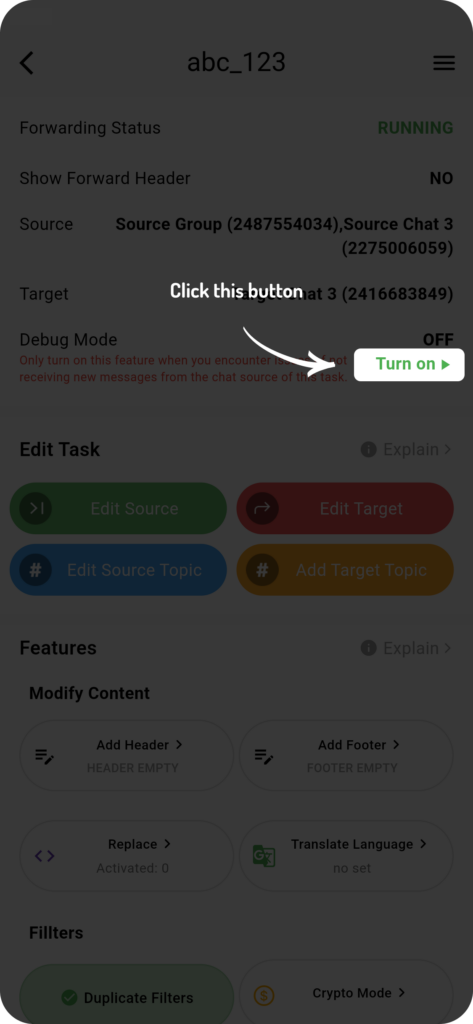
**Step 3: Activate Debug Mode**
1. On the **Detail Task** screen, locate the **Debug Mode** section.
2. Tap the **Turn On Feature** button
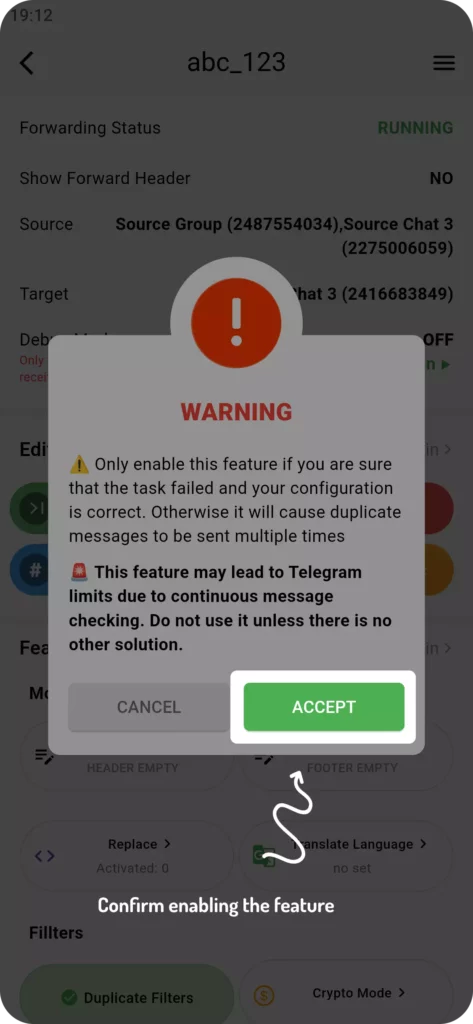
3. A confirmation popup will appear. Select **ACCEPT** to active Debug Mode.
Click “Turn on” to enable the feature
Click “ACCEPT” to confirm enabling
**Step 4: Wait for Debugging to Begin**
1. After activation, wait at least **5 minutes**.
2. Monitor the task for new incoming messages or updates.
**How to Disable Debug Mode**
**Step 1: Open the Detail Task Screen**
1. Return to the **Detail Task** screen for the task with Debug Mode enabled.
**Step 2: Deactivate Debug Mode**
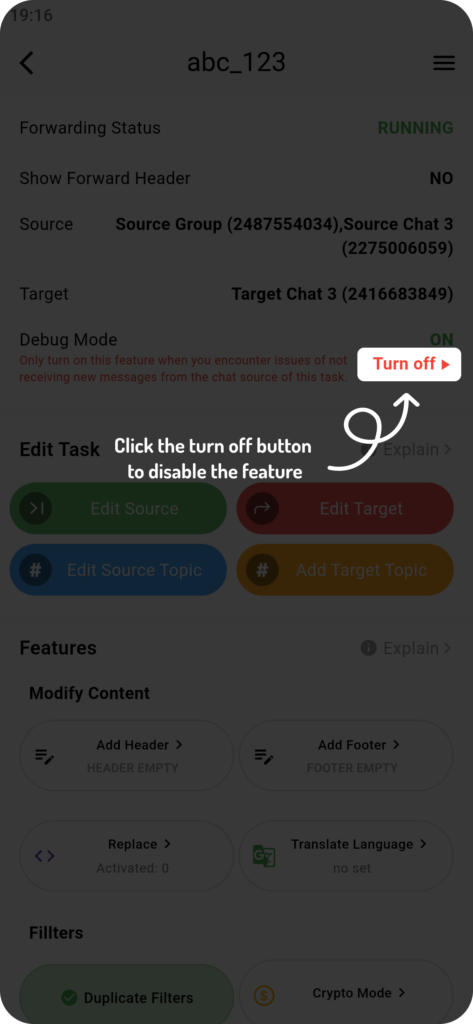
1. In the **Debug Mode** section, tap the **Turn Off Feature** button.
2. Debug Mode will be disabled, and the task will return to normal operation.
Click “Turn off” to disable the feature
**Tips for Best Use**
* **Only use Debug Mode when necessary.** Continuous message checking may result in Telegram-imposed limits or performance issues.
* **Disable Debug Mode after troubleshooting** to restore normal operation and avoid unnecessary system strain.
* Review your source and target data before creating the task to ensure everything is set up correctly.
By following the steps outlined in the article above by the RedFox team, you can effectively resolve message forwarding issues while minimizing potential risks.