Add Header / Footer
Want to customize your Telegram auto-forwarded messages with extra context, branding, or call-to-actions? With the Auto Forward...
You can add a header or footer for each post when forward to channels target
Download Mobile App or use Web
✅ iOS → App Store ✅ Android → Google Play ✅ Web → web.autoforwardtelegram.com
How to add Header - Footer use App/Web

What Are Headers and Footers in Telegram Forwarded Messages?
A Header appears before the forwarded message. It’s perfect for labels, sources, or attention-grabbers.
A Footer appears after the message. It’s ideal for links, time stamps, disclaimers, or emojis.

These two blocks work independently but can be combined to elevate your message presentation.
1️⃣ Add a Header to Make Messages More Understandable
A header appears before your original message. This is perfect for labeling content—like announcements, reminders, or alerts.
How to Set It:
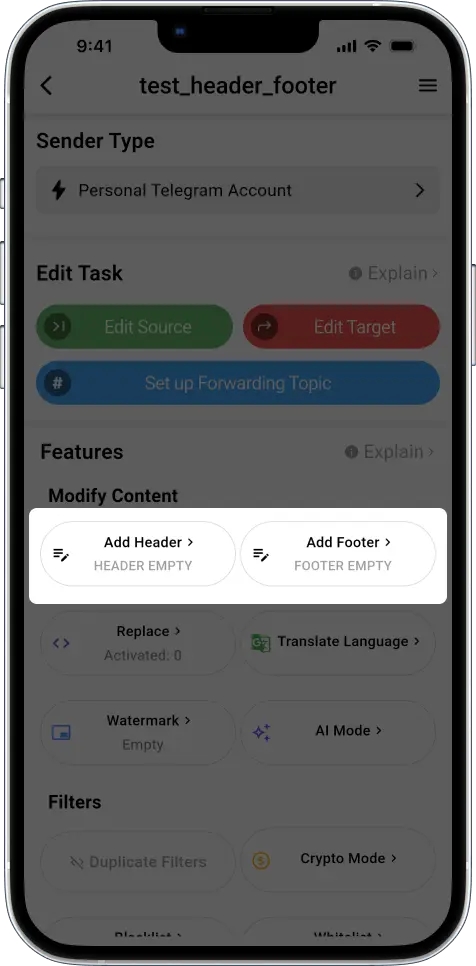
Open your existing forwarding task
Scroll to the Header section
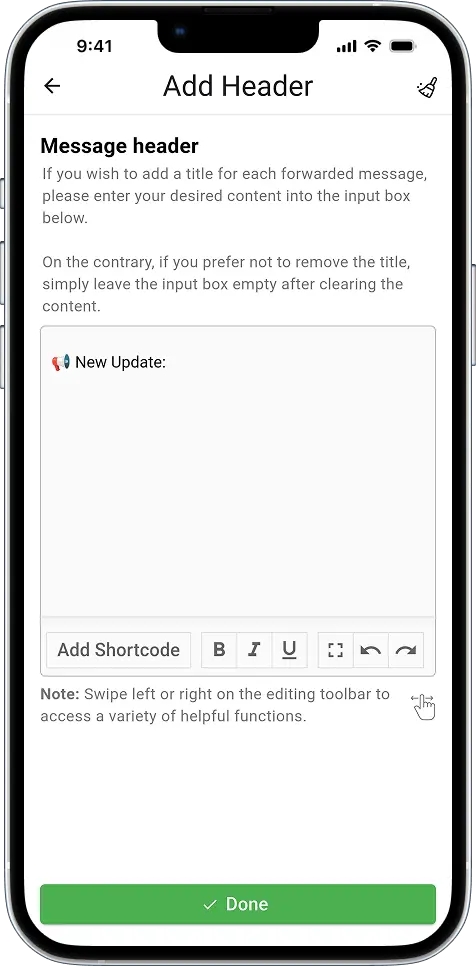
Type your custom content
Tap Done

Example Header:
When someone sends a message like:
Your target chat will receive:
You just made the message more readable and clearly tagged its purpose.
2️⃣ Add a Footer with Extra Info or Links
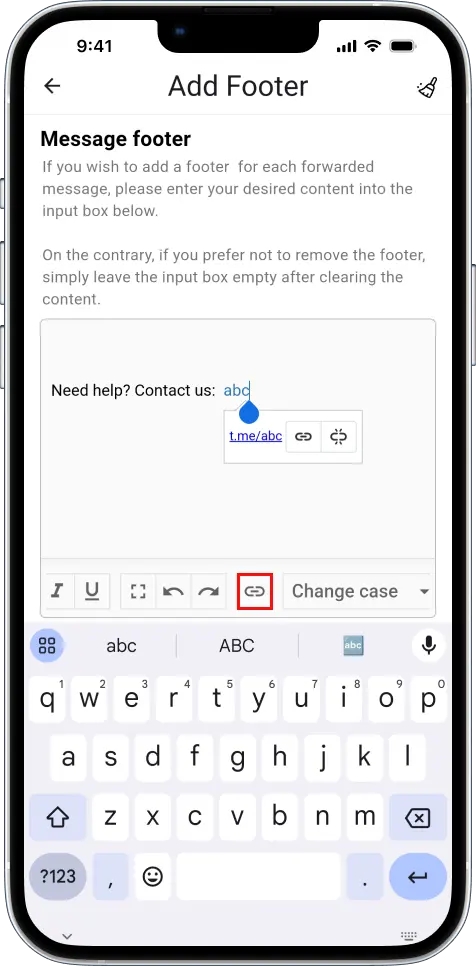
A footer appears after your message. It’s ideal for contact links, disclaimers, or just a nice wrap-up.
How to Set It:
In your task, go to the Footer section
Write your content, using line breaks (
\n) for clarityTap Done

Example Footer:
Now if someone forwards a message:
It will show like:
Perfect for support teams or help desks.
✨ Use Shortcodes
If you’re running a crypto signals group or sharing on-chain alerts, shortcodes make your formatting dynamic and automatic.
What Are Shortcodes?
Shortcodes are special tags that get replaced automatically in forwarded messages.
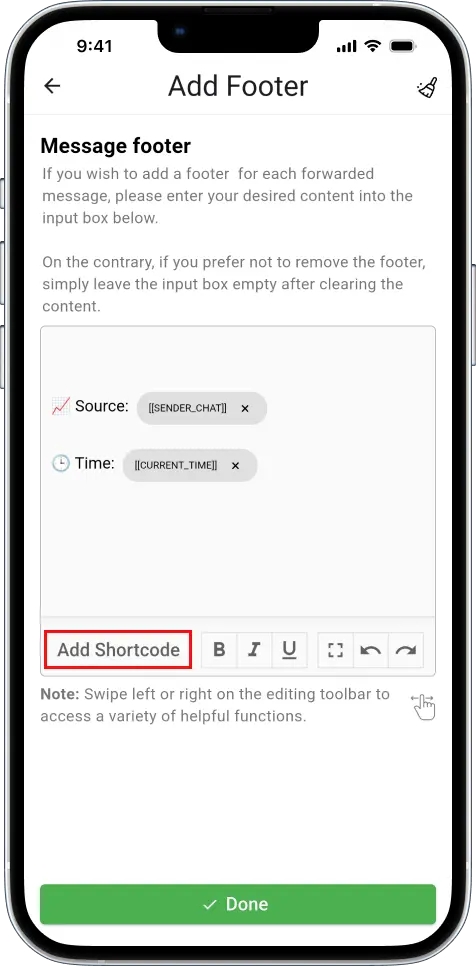
How to Use:
Go to Header or Footer section
Tap “Add Shortcode”
Choose what you want
Insert into your text and save

📖 Some formats you can refer to:
🔧 Formatting Helpers
EMPTY – Use this if you don’t want to show the header.
\n – Line break.
\t – Add a tab space (horizontal spacing).
🧾 Message Content
[[ORIGIN_TEXT]] – The full content of the original message.
[[ORIGIN_QUOTED_TEXT]] – A quoted preview or snippet from the original post.
[[ORIGIN_DESCRIPTION]] – Description of the original channel or group.
👤 Sender Information
[[ORIGIN_USERNAME]] – Username of the original sender (if available).
[[ORIGIN_USERID]] – Telegram User ID of the original sender.
[[ORIGIN_NAME]] – Full name of the sender or the original channel name.
[[FROM_USER]] – Username of the user who forwarded the message.
[[SENDER_CHAT]] – Display name of the sender (can be user or chat).
[[FORWARD_FROM_CHAT]] – Name of the original message owner or source channel.
🕒 Time & Date
[[CURRENT_TIME]] – Current system time (HH:MM:SS).
[[CURRENT_DATE]] – Current date (DD/MM/YYYY).
[[CURRENT_DATETIME]] – Full current date and time.
[[CURRENT_TIMESTAMP]] – Current Unix timestamp.
[[ORIGIN_POST_TIME]] – Time the original post was created.
[[ORIGIN_POST_DATE]] – Original post creation date (raw).
[[ORIGIN_POST_DATE_FORMATTED]] – Formatted post date.
[[ORIGIN_POST_DATETIME]] – Full date and time of the original post.
📎 Post Metadata
[[ORIGIN_POST_ID]] – Message ID of the original post.
[[ORIGIN_CHAT_ID]] – Chat ID where the original post came from.
[[MESSAGE_ID]] – ID of the current message.
[[REPLY_TO_MESSAGE_ID]] – ID of the message this one is replying to.
[[IS_FORWARD]] – Whether the message is a forward (true / false).
[[IS_REPLY]] – Whether the message is a reply (true / false).
[[MESSAGE_LINK]] – Direct link to the original or forwarded message.
📡 Chat Information
[[CHAT_TYPE]] – Type of chat (PRIVATE, GROUP, CHANNEL, etc.).
[[CHAT_USERNAME]] – Username of the chat (if public).
[[CHAT_MEMBERS_COUNT]] – Number of members in the chat.
[[SOURCE_NAME]] – Name of the forward source (if available).
[[ORIGIN_NAME_URL]] – Hyperlinked name of the original source.
📂 Media Information
[[MEDIA_TYPE]] – Type of attached media (photo, video, document, etc.).
[[FILE_SIZE]] – File size (formatted).
[[FILE_NAME]] – File name.
[[HAS_MEDIA]] – Whether the message contains media (true / false).
📊 Message Stats
[[VIEW_COUNT]] – Number of views (for public channel posts).
[[FORWARD_COUNT]] – Number of times the message was forwarded.
[[REACTIONS_COUNT]] – Total number of reactions (if any).
✏️ Text Analysis
[[WORD_COUNT]] – Number of words in the message.
[[CHAR_COUNT]] – Number of characters.
[[LINE_COUNT]] – Number of lines.
[[TEXT_LENGTH]] – Length of the text (same as character count in most cases).
🔍 Content Extraction
[[HASHTAGS]] – All hashtags found in the message.
[[MENTIONS]] – All mentioned usernames (@user).
[[URLS]] – All URLs found in the message.
🎲 Randomization
[[RANDOM_EMOJI]] – A random emoji from a predefined collection.
[[RANDOM_NUMBER]] – A random number between 1–1000.
Example Footer for Traders:
So when a message is sent in your source group/channel, like:
Your target group/channel will receive it like this:
No need to manually tag anything—it updates itself every time.
Auto-Hide Header When Content is Empty
If the forwarded message has no content, the header will now be automatically hidden.
This keeps your messages clean and professional – no more awkward blank blocks!
How to Set It:
Open your existing forwarding task
Scroll to the Header section
At Add Header/Footer turnon Hide when empty
Click Done

Random Header/Footer
Make your messages more dynamic and natural! You can now set multiple header or footer templates, and AutoForward will randomly pick one for each forwarded message. Ideal for marketing, engagement, and avoiding repetitive content
How to Set It:
Open your existing forwarding task
Scroll to the Header section
At Add Header/Footer enter content then click Random


Finaly Click Done.
Last updated